Coming back to work on the bike and I find that my fuel pump isn't priming... Great... Working round the whole bikes electrics i check the continuity and voltage across the loom that the fuel pump would use... All working fine... I take the fuel pump out to have a good look at then it stares me in right in the face!
A good tip for people having trouble with their fuel pump not priming is to check all the connector in the circuit carefully as this will be the problem 90% of the time. In my case one of the male connectors on the base of the fuel pump had corroded pretty bad and gone rusty. As it was in a difficult position to clean i used a dremmel to remove the rust and then applied contact cleaner... Jobs a goodun.
Ok back to the actual post. To save weight and carrying on the theme of giving the bike cleaner lines, i wanted to install an integrated tail light unit. The units that used LED's and integrate the side light, brake light and indicators all in one small compact unit. So to match up with the CBR600rr rear end i have planned for the bike i purchase a 'solar cbr600rr integrated tail light unit' off of ebay. the unit was cheap but removing it from its packaging it looks to be fairly decent quality. Problem with the unit is that it came with no instructions and im trying to wire it up to a vfr not a cbr...
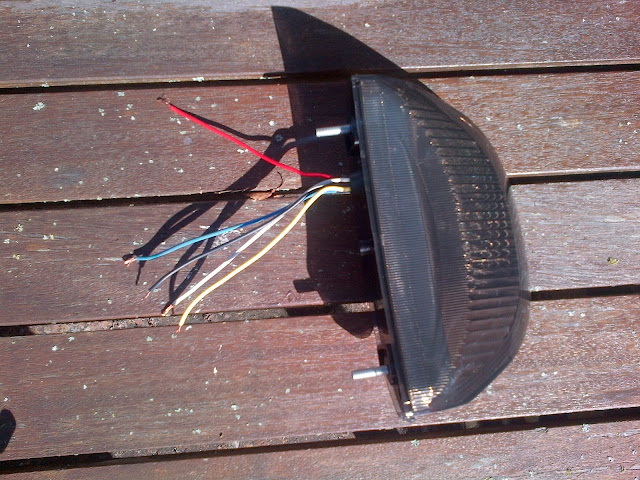
-Heres the unit, as it came, no extra fittings or instructions given. A;so the connectors at the end and the wiring system is completely different to the vfr.
- I firstly shortened the units wires losing the connectors it came with, stripping the ends ready.
-I put shrink wrap around the majority of the wire to keep it neat and for some protection. Also i soldered some male bullet connectors on the ends.
- i made a plastic bracket and attached this to the undertray i made so that the light could be bolted to this using some wing nuts. before fixing it was made sure it was in the right position by using the rear fairing i will be using.
- Here are the cluster of wires used for the VFR's rear tail light unit. Here you can see the completely different wiring colours/connectors/numbers/set-up.
 - Here the two wiring systems together. I striped the vfr wire connector and separated them all. Then using a multi meter i deducted what each wire for the vfr did and then applying a direct voltage to the tail unit to find out which wire made which function.
- Heres the wire matching system i deducted, the colours on the left being the ones on the tail unit and the ones on the right are the vfr's.

- The image to the left is the female bullet connectors i used, using a nail u can tap the inside out of the composite sleeve. Then the image on the right shows the sleeves place on the wires first and then the female connectors are then soldiered into position.
- All the wires soldered up, sleeved place back over and males and females connected respectfully.
- Unit and wires all in place, looking quite neat and giving a good weight loss from the big vfr tail light unit.
- Moment of truth and it all works beauuuutifully. And for that i will commend the solar product - its bright and clear, the only criticism i have is that the indicator blinks a little too fast, if this bothers you too much you could just add some resistors in the series but for me its fine.
Please see below a video of the integrated tail unit in operation:


